Wednesday, July 16, 2014

Tiny-G Mint Ice Baby Makeup Tutorial


Hi!
    I know that last week I didn't post at all, so my bad :( I was hosting a youth event at my house, so I was a little preoccupied. But, I am back with a new K Pop makeup tutorial for some of one of my favorite groups. Tiny-G is one of my favorites, because they are all my height! Shawtie's for the win! ( I myself am only 5'1) Anyway, Mint is my bias and I loved her makeup in this music video. The song is really catchy and I find myself singing it ALL THE TIME around my house. It's about a couple who used to be really close and spent a lot of time with each other, and now the guy has freezed her out and distancing himself, telling her he wants to break up. It's really upbeat for a break up song. And now, the part you have all been waiting for, the tutorial!!!

Face ~
1. Prime
     The first step, is to get baby doll porcelain skin, so you need a pore primer, I'm using Dr. Young Anti Pore Eraser to give my skin a more flawless look. The way I apply it, is my patting it into my t zone aka where my pores are the largest, and then smooth it over the rest of my face for an even look.

2. Base
     To create a flawless canvas, I'm applying a liquid foundation over my skin. I'm loving Innisfree Smart Foundation in Water Balancing, because my skin can get really oily along my t zone in the summer, but this stuff stays on, lemme tell ya, it's magic for combination skin. I applied the foundation with a damp beauty blender.

3. Conceal
     Okay, it's true, I have raccoon eyes. It's because I'm up late watching FNL or You Who Came From The Star. I've been getting better lately, but I still have those awful dark circles. I love to use the Skinfood Salmon Dark Circle Concealer Cream to help conceal and brighten my under eyes. You can apply as many layers as needed and it won't look cakey. I applied this concealer with my ring finger and tapped it in to blend it out.

4. Set
     To give a natural, long lasting finish to the skin, dust on some powder. I like the Maybelline Fit Me Pressed Powder in 110 because it is a shade that is almost translucent, but makes the skin look 10x better. I dusted the powder across my face with a powder brush by Eco Tools.

Eyes ~

1. Brows
    Straight Eyebrows are the name of the game, so I'm going to fill in my brows a bit thicker with the Etude House Perfect Brow Kit and an angled brush. I don't really feel like this step needs explaining, just fill in any sparse areas and your good to go.

2. Prime
     For this look I needed a golden based skin toned shade, and I have been loving Skinfood's new Seaweed Waterproof Shadow Stick in Mineral Beige. It is so creamy and blends out like a dream. Also the neat thing, is that it is a little sticky, not in a bad way like some lip glosses, but it is wetter, so the other eye shadows that you apply over top of it, are not going to budge. Which is great new for any of you out their with oily eye lids. I applied it right out of the twist up tube onto my lids and blended it out with the sponge that comes with it.

3. Base
    I love this look, because it can flatter any eye color. The lid color is from Stila's Sweet in San Francisco and is called Golden Gate. It is the perfect coppery bronze shade for this look. It creates some nice depth to the eyes and shimmer. I applied it with a fluffy brush over my lid, and blending it out above my crease.


4. Shade
    I love the pinkish brown shade that Mint has on her outer corner and crease line. It flatter her complexion so nicely. Luckily, from the same palette I just used, the shade Nob, creates a very similar look. With the same fluffy brush from earlier, I'm lightly going to concentrate the color on the outer fourth of my lid and dragging the remainder into the crease.

5. Tight Line
     Tight lining can really complete a look. It makes your lashes look fuller and gives your liquid eyeliner some OOMPH. Ya'll know what I'm talking about ;) So I'm going to use the NYX Slide On Eyeliner in Jet Black on my tight line. It is waterproof, so it won't wash off during the day.

6. Line Lashes
    What I mean by that is line your upper lash line with a black liquid eyeliner and extended it out, not up. This look is focused on Mint's puppy dog eye that have a downward slant, so you want to follow the shape of your eye the best you can. Make it thicker on the end and thinner as you go in. I'm using the Skinfood Sweet Almond Eyeliner because almond oil is so good for your lashes.

7. Aegyo-Sal
     Aegyosal is a Korean word for the chubby part of flesh that is under your eye. In this look, Mint has some sparkly eyeliner going on there, so to give me the same look I'm using the Etude House Tear Drop Eyeliner in White Tear, which is a really pretty white shimmer with pink flecks and really brings out green and hazel eyes.


8. Lashes
    Mascara is a wonderful invention. But, if you have naturally straight lashes, curling before hand will help immensely. I love curling my eyelashes with the Etude Lash Curler and then go in with the Etude House Lash Perm All Shockcara. It gives the lashes an awesome look and will give you a thicker and longer look.

Lips ~

1. Conceal
     Okay, to get a gradient Ulzzang look, you have to conceal the outside portions of your lips and I do that with the Aritaum Wannabe Lip Cushion Concealer in Clair. I go along the outside portion and blend it in with the handy dandy sponge side.

2. Tint
     To create the base for this gradient look, I'm going to apply a bright pink tint to my lips. It will help to give the lips a fading look. I'm loving Innisfree Eco Flower Tint in Azalea because depending on the shade of your lips, it will take on a different shade, which is pretty darn cool if you ask me.
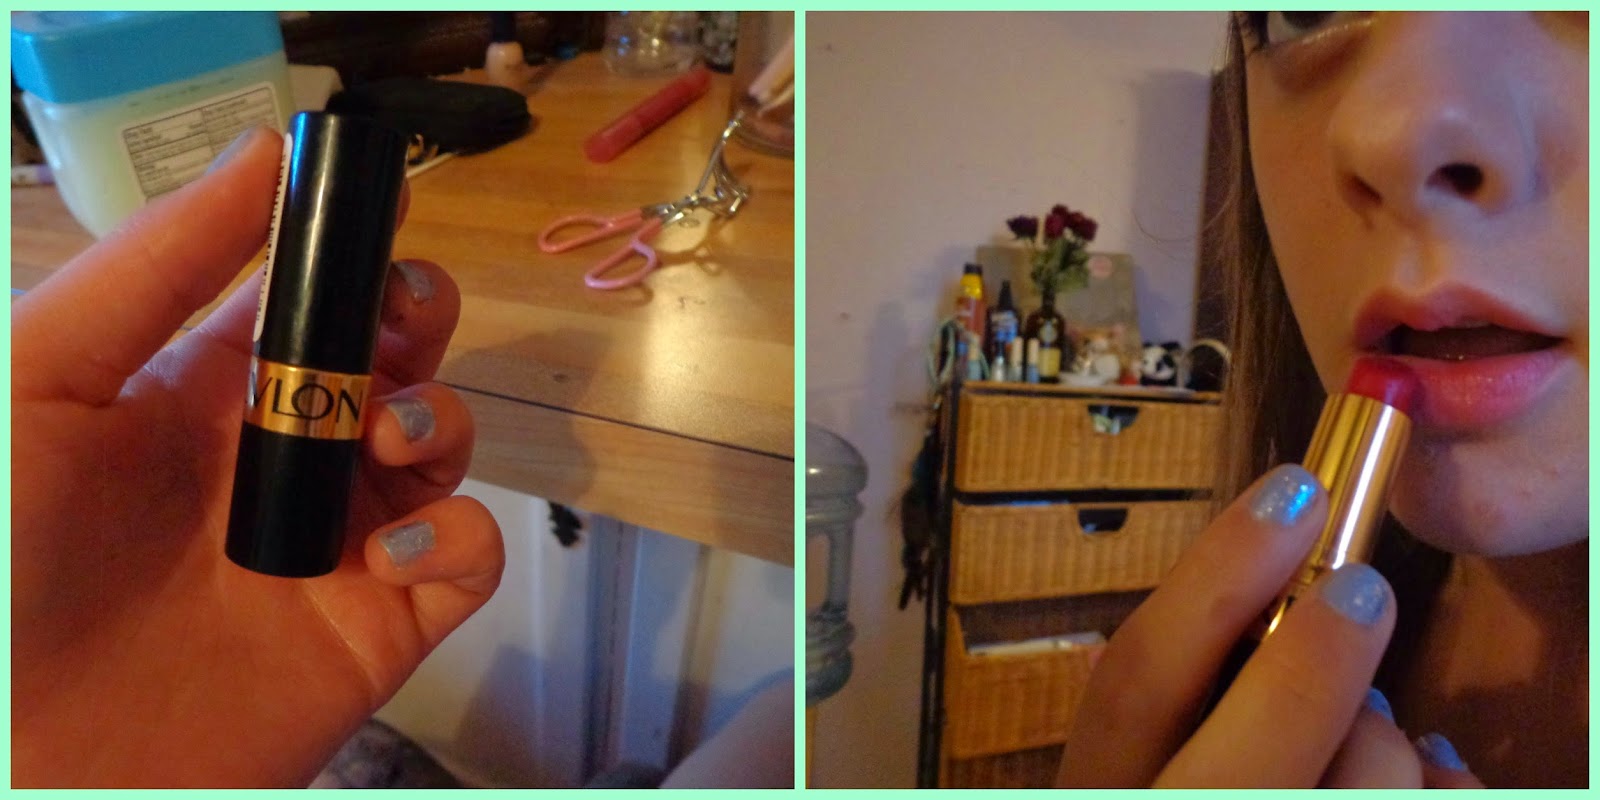
3. Fade
    To finish this look off, take a red lipstick and dab it just on the inner portion of your lips and then blend it out with a finger. To give it a natural- er fade, apply the tint again over top. I'm using the Revlon Super Lustrous Lipstick in Certainly Red which is a beautiful creamy cool toned red.

Finished look ~

     I hope you all enjoyed this tutorial! Make sure that you follow me for more K Pop makeup tutorials and skincare advice. By the way, I've started filming on my YouTube channel again, so make sure that you check those out too. I love you guys so much, and I wanted to share some cool news with you all: We have hit 6,000 views! It makes me super happy to know that so many of you have supported me with my blog! I'm going to try to upload one my blog once a week and my YouTube once a week. I can't wait to see what this next year will bring to us! Lots of love and hugs through the internet,
Gracie ^.^


Song Of This Post-
Ice Baby- Tiny-G

→EMAIL ME @←✉BUSINESS INQUIRIES ONLY PLEASE!✉graceashipley@gmail.com

Monday, July 7, 2014

Orange Caramel Nana Abing Abing Makeup Tutorial


    So,
    First it was sushi, and now it's ice cream. Although I do understand it  is hot in the summer and you always want something cooler, so it suppose it does make sense. No matter the odd concepts, their makeup in the video was fresh and perfect for summertime, so I have to give them brownie points for that. Also the outfits were kinda cute to me, and gave a really nice overall cute effect. Without any more blah blah, let's get started!

1. The first step is to create a base for the rest of the products to stick to, and I love Laura Geller's Spackle Tinted Make-Up Primer in ethereal to help create a luminous, flawless base.

2. If you have any problematic areas, apply some concealer onto your freshly primed skin. I used the Skinfood Rice Pen concealer for my dark circles and Hard Candy Glamoflauge concealer for any spots.

3. Now, I have darker skin since it's summer, but to give the look of paler skin, I'm using the Tonymoly Pure Aura CC Cream. I dotted it on my face and then blended it out with a beauty sponge.

4. Lastly for the base makeup, I'm using the Etude House Any Mineral Cushion Foundation on the high points of my face, so my chin, cheekbones, bridge of my nose, and my cheekbones.

5. As always, I'm filling in my brows with the Etude House Perfect Brow Kit. I like to use and angled brush to make it more precise.

6. For the first shade, I'm applying M.A.C's Soba over my eyelid up to my crease.

                           
7. Lastly for the shadow I'm going to take a shade that is slightly darker then Soba, and put that along my lash line and under my eye onto my aegyo-sal. I'm using Innisfree Eco Mineral Eye Shadow in 26.

8. I'm mixing two different eye liners together to create the perfect shade that Raina is wearing. I applied the liner all around my eye, so that's my upper lash line, my lower lash line, and that little inner corner part. I used NYX Jumbo Eye Pencil's in Dark Brown and Iced Mocha. 

9. Last step for the eyes, is to curl your eyelashes and then apply some mascara. I'm using to different ones, to give me a more false lash appearance. I used the Nature So Big Curling Mascara and the Etude House Lash Perm All Shockara.

10. For the lips I mixed three different products to get the perfect color and applied it to my lips in a dabbing motion with my finger tip. I mixed 2 of Aritaum's Cushion Lip Tints in Clair and Sugar and then mixed in the Korres Lip Glaze in Laurel. But, if you have a glossy nude peach color, that would work just as well.


    That's it everyone!! I hope you enjoyed this tutorial. Hopefully by the end of the week, I'll have another tutorial to share with you for Victoria in F(x)'s new Red Light music video. I'll see you then! I also just uploaded my June Favorites on YouTube, so check that out as well, and I will try to get back to ya'll soon with more fun stuff!
Gracie ^.^

Song of This Post-

Sunday, June 22, 2014

2NE1 CL Gotta Be You Makeup Tutorial


Hello Lovelies!
    Okay so I have yet another 2ne1 makeup tutorial, and this one is for CL's makeup in Gotta Be You, there latest music video. Hopefully soon, I'll be doing the Orange Caramel Abing abing makeup tutorial, and maybe some AOA and APink and who knows what after that (: Anyway, Cl's makeup stood out to me the most in this video because of the statement blue eyeliner, I loved it so much and knew immediately that she was going to be the feature for this tutorial.


1. First, I'm applying a pore primer along my T-Zone to minimize the appearance of my pores. I'm using the Dr. Young Anti-Pore Primer before applying the Physicians Formula Super BB Concealer to my under eye area to add some brightness to my face. I apply the Covergirl 3-in-1 Foundation with a beauty blender, and setting it all with the Etude House Precious Mineral Any Cushion.


2. Next I'm priming my eyelid to give the shadows something to stick to. I'm using the Too Faced Shadow Insurance here, which is one of my favorites for colorful eye makeup.

3. I'm first going to apply a cream colored eye shadow to the inner portions and T area of my eye. The T area is right above the crease and above the eyeball. This will help to make you eyes appear more open.


4. Taking a light brown color on a fluffy brush, I'm swiping it across my eye lid, only to the crease.

5. For the last eye shadow, I'm taking a dark taupe shade into the crease with an angled brush. This will make the eyes look bigger and more cat shaped like CL's.


6. Taking a dark navy blue eyeliner, create a thick cat eye line.


7. I'm setting the eyeliner with a similar eye shadow to set the eyeliner, to make the liquid eyeliner apply smoother over top.


8. Take a black liquid eyeliner and make a medium winged eye liner look. The navy eyeliner should be peeking out from the black.


9. Apply a thick coat of mascara to your top and bottom lashes. I like this Etude House All Shockcara, to give my lashes length and volume.


10. I'm taking a bronzer and applying it to the hollows of my cheeks to slim my face and give it a V-Line.


11. Apply a hot pink lip tint over bare lips. I love the smell of this one! It gives the lips a nice natural hot pink look.


12. Lastly to give it more of a bright look, I'm applying a hot pink gloss over top of the tint.


    That's it for today! I promise that after the 15th of July, I'll be posting a lot more K Pop tutorials (: I did take my own little spin on this look, to make it a bit more wearable, but keeping with the concept. I like how the blue makes such a subtle statement that packs such a punch! I'll see you all soon with reviews and hopefully squeeze in one more pre-photographed tutorial soon. Until next time,
Gracie ^.^

Song of this Post-
Movements- The Solution

Tuesday, June 3, 2014

Memebox #13 Unboxing: The Makeup Edition


Hi Kiddos!
    It's that time again!! Memebox made yet another makeup box, and I'm here to share the contents of that with you. I'm not going to lie, I was expecting a little more from this box, so I might not sound too ecstatic or anything. It wasn't bad, per say, it just wasn't up to Memebox's original par. That aside, her are my thoughts on this box.


1. Cheek Room Makeup Base
Full size: 15g ($38)
Box size: 30ml($9)

Product Description:
     This Waterproof and moisturizing makeup base us made from various flower extracts, silli-powder, and art-pearl; it will provide the perfect first layer of your skin makeup by maintaining  your skin moist, silky, and translucent for a natural look.

How to use:
     As the first step of your makeup, take a small amount and apply it evenly over your face using your fingers to gently pat it on.

My thoughts:
     OK, so first off, I'm not the hugest fan of the packaging. There are so many patterns on it and the blondie, just looks raunchy. That aside, this product has a really nice feel to it. They gave you a random selection between green and lavender, and I'm happy I got the green kind, since that is particularly for redder skin or problematic skin. I probably won't use this too much right now, just because I just got the Laura Mercier Spackle Primer in Ethereal and it is to die for, but maybe later on in the year I'll get some use out of it.

Rating: 4.5


2. Dr. Young Anti Pore: Pore Eraser Balm
Full size: 15g ($38)
Box size: 15g ($38)

Product Description:
     Enriched with witch hazel, Swiss alpine herb extracts, marine collagen, and vitamin 5, the pore eraser balm is a primer perfect for featuring the soft, silky, porcelain skin. This pore primer will fill in all the fine lines and enlarged pores and control excess sebum for a long-lasting look.

How to use:
    After skincare, apply adequate amount on areas with visible pores or oily spots.

My thoughts:
     This is my favorite product in this box, because I see myself using it once the school year comes back around. The ingredients that it features seem so awesome, and the texture is beautiful. Not to mention that awesomely natural floral scent. I adore simple packaging, because to me, that means that the ingredients are simple. The reason why I believe that, is because it shows that they spend more money on the ingredients then the packaging, so your bound to get better ingredients. I'm actually really happy about this product.

Rating: 5


3. MustaeV Spot Eraser Concealer Pencil No.5
Full size: 3g ($18)
Box size: 3g ($18)

Product Description:
     This soft, pencil-type concealer will delicately cover up even the smallest blemishes or fine lines. It's creamy texture also offers a long-lasting coverage without stimulating skin troubles or sensitive skin.

How to use:
     Fill in the spots you wish to cover up with the concealer pencil and use your fingers to smear the boundary between concealer & foundation for a natural gradation.

My thoughts:
     Honestly, this isn't that creamy. Compared to my favorite pencil concealer, Hard Candy Camouflage Stick Concealer, it's super hard. The color fits my skin tone well, but I'd rather have gotten a BB cream instead. Obviously they weren't worried with what color people's skin is, so they should have just given us a BB or CC product. Besides from that, the consistency is okay. Like I said, it's really not as creamy as the product description lets on. Maybe if I took a concealer brush to it and applied it that way, then I could use it. But because the texture is rougher, I don't think I'll be using it that much.

Rating: 2

4. N.S.M Cooling Tint or ReBorn Sorbet Melting Tint
Full size: 5g ($21)
Box size: 5g ($21)

Product Description:
     The Cooling Tint and the ReBorn Sorbet Melting Tint Gloss create a bio-film over your lips to protect and maintain moisture within.What makes lip products so much more special is their texture; the moment you apply them, they will instantly melt into your lips with a soothing and cooling feeling without being too glossy or sticky.

How to use:
     Apply the tint gloss on your lips from the inner contours for a natural gradation.

My thoughts:
     I hate the packaging. Really. It looks like a 90's rainbow. The colors really don't go together, but I do like the product a lot. It looks really nice on my lips, giving them a coral look to them. Since taking these pictures, I've tired out this tint a few times, and it looks very fresh. It doesn't have a very good lasting ability, and it washes of very easily, which are not good traits in lip tints. I need a full on, heavy duty product when it comes to tints. I like the color and the product does feel very nice on the lips, but it doesn't do the basic things that a tint should, like be waterproof or long-lasting.

Rating: 3


5. Ladykin Blossom Blusher
Full size: 8g ($15)
Box size: 8g ($15)

Product Description:
     This is a soft, micro-textured blusher which can be layered multiple times without sticking together and blocking up your pores. It will naturally blend onto your cheeks  and maintain it's vibrance all day long. There are five different shade options available, offering a wide color spectrum from romantic pink to luxurious pearl pink.

How to use:
     Apply the blusher on your cheekbones and blend it together for a natural gradation.

My thoughts:
     I like this product a lot. The packaging is so cute and nice. It doesn't feel cheap which I really enjoy. The product is really finely milled, which feels very nice on the skin. The color I received was called Berry Sorbet, and was a peach toned pink. I actually have a blush that looks just like this, with the exact same texture. I'm talking about The Face Shop Lovely You&Face Blusher in Peachy Pink. It could be a dead on dupe. Although this product has a bit more pigmentation, then Peachy Pink, so I might use it.

Rating: 4.5


End Thoughts:
    Well, I like how many full sized products where in here, but I wanted some brands that I knew of, but it's the first time I've heard of 4/5 of these brands. I also wanted some eye products in this box, but alas, there was a large amount of face products. There are some items in this box that I think are great, but most of it was just bleh. Of course, I'm still going to buy more Memebox's, but I hope that the other ones I try will be better then this one. I've really like the previous ones I've gotten, so I expect that I'll get some more that are just as great.

Price Paid: 29.99 (Mine cost 19.99 because I had 10 Memebox points)
Box Worth: $101

Overall Rating: 3.8

   I hope you guys liked this post. Sorry that it wasn't the happiest I've ever been about Memebox. I love this companies services, but sometimes it just doesn't work out well for me. Tell me what you think about the Memebox 13: Makeup Edition in the comments below. Did you like it? Did you think it was just bleh? I'd love to hear from you!
Gracie ^.^

     This link will hook you up with some awesome, exclusive deals! So be sure to check it out ;)

Song of this post:
Talk!- The 1975